Hosting a static site on Amazon S3 & deploying it with Github & Travis
This site is built by Jekyll and hosted on Amazon S3 and its source on Github and deployed on push through Travis CI to emulate Github Pages' ease of use. In this post, I will try to explain all the steps required to setting it all up.
Amazon setup
I was pleasantly surprised to see that serving a static website out of a S3 bucket was extremely easy. The only annoying part was the payment verification which takes some time and requires a working credit card, not really an issue but can be a dealbreaker and definitely loosing in usability compared to Github Pages.
If you don't have an AWS account, go here and click Sign Up, it will ask you for the usual (name, email, password) and if I remember correctly you then reach the billing step where you have to enter your credit card details and enter a code given to you through an automated phone call. The first year you have access to Amazon's free tier, which should more than enough for most people.
Setting up the buckets
Once you have access to your Amazon console, create two buckets in the region of your choice, named after your domain (in my case lirsac.me for main zone apex domain and www.lirsac.me for the usual domain). This is just to makes sure both domain are accessible, though you might not need it if you use a CDN service like Cloudfront or Cloudflare. Setup logging if you want, but if you don't need access logs or already use some kind of web analytics, you can forget it and limit the S3 storage you will use. Once the bucket is created select it click on the Properties link in the top right corner, you can then setup static hosting like so:
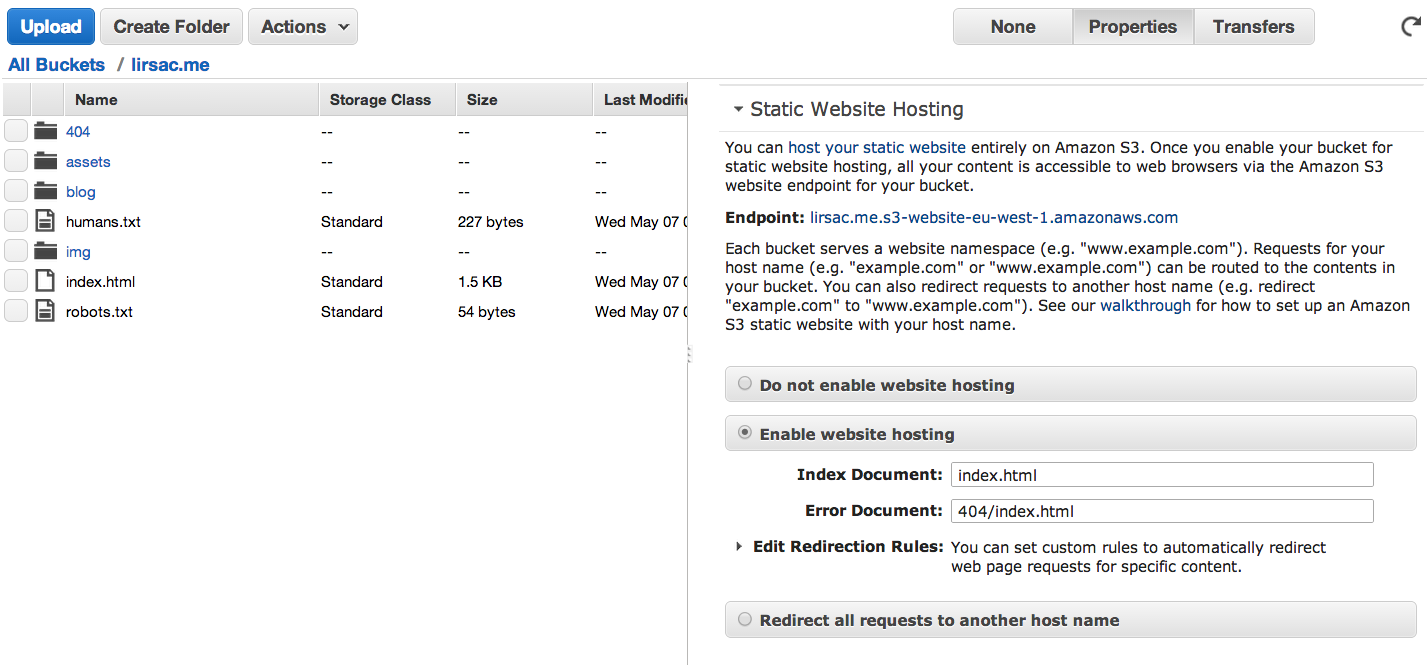
You also need to make all the files in the bucket public. This can be done with a simple bucket policy. (In the bucket properties: Permissions > Edit bucket policy):
{
    "Version": "2008-10-17",
    "Statement": [
        {
            "Sid": "PublicReadForGetBucketObjects",
            "Effect": "Allow",
            "Principal": {
                "AWS": "*"
            },
            "Action": "s3:GetObject",
            "Resource": "arn:aws:s3:::lirsac.me/*"
        }
    ]
}
This allows GET request for everything in the lirsac.me bucket. If you have already an index page, you should be able to access your bucket (apex or no) at the Endpoint url (Try this for example). As I don't use any CDN, I set up the second non-apex bucket to redirect over to the first one:

That's it for the S3 part, for more information the AWS documentation is pretty extensive with examples for virtually anything. Next up is setting up your domain so that you can access your website with the correct urls.
Pointing your domain to the bucket
There are plenty of ways to point your domain to you S3 bucket, the simplest in my opinion was using Amazon's own Route 53. To get started, create a hosted zone in the Route 53 console, it should appear like so:
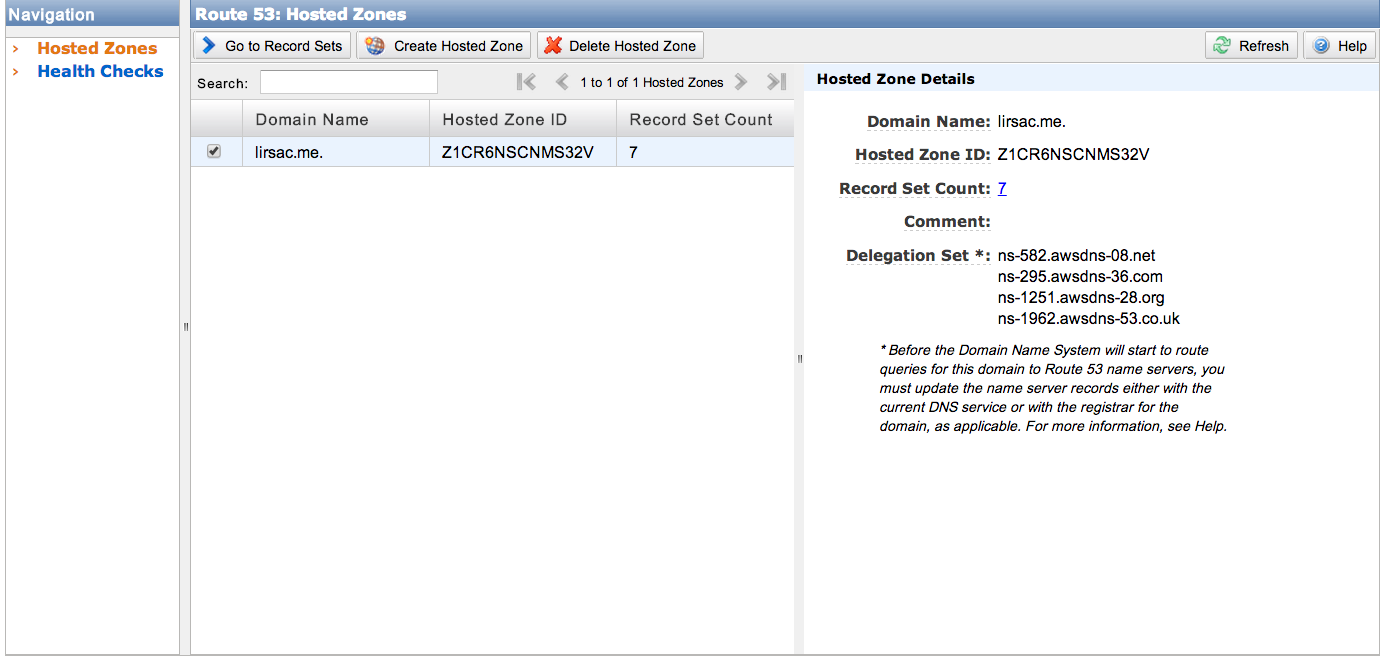
Next update your registar with the DNS servers given in the Delegation Set section to allow Route 53 to manage your domain. To point your domain just click Create a Record Set select A -IPv4, then select the Alias checkbox and you should be prompted with the correct bucket address. In the end the config panel of the A record looks like this:
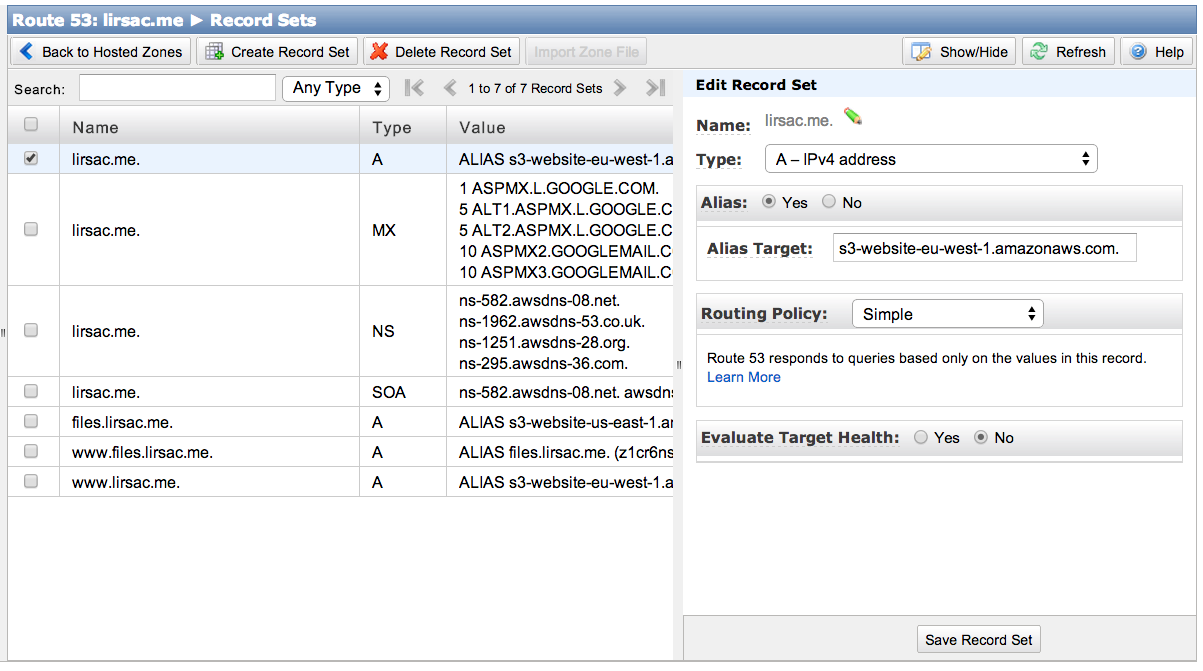
Do the same for both bucket and you're all set. Just wait for the records to expire and you should have access to your files on the apex domain and non apex domain.
Getting deploy on push to work
s3_website
To automate the upload to S3, there is a very useful command line tool called s3_website by Lauri Lehmijoki which is pretty simple to set-up. It also discovers the _site directories if you're running a Jekyll site and only
It can be installed as a Ruby gem, and config is stored in a s3_website.yml file (You can create a starter file by running s3_website cfg create in your project directory).
My config file is pretty minimal and looks like this at the moment:
s3_id: <%= ENV['S3_KEY'] %>
s3_secret: <%= ENV['S3_SECRET'] %>
s3_bucket: lirsac.me
s3_endpoint: eu-west-1
max_age: 120
gzip: true
There are a lot more options available (Cloudfront cache invalidation, excluding and ignoring files, reduced redundancy... it's pretty awesome if you want to automate S3 assets management), but those work for a simple blog. It just sets the credentials, bucket name and S3 region (see available values), plus activates gzipping of all files.Note that the s3_id and s3_key values are read from your environment variables which will be useful to run this on Travis without exposing your credentials.
To push to S3, just run s3_website push or s3_website push --headless (delete files from S3 which are missing on the local site without prompt) from the project directory.
Setting up Travis
So we have now setup a static website on Amazon, reachable at your domain and to which you can push the Jekyll build updates via a simple command. Now what would be nice is having all of this work as seamlessly as possible (like Github pages for example) and just work on your Github repo. For this I use Travis, a continous integration system which builds from Github pushes. It is super simple to setup and is free for open source projects.
The .travis.yml config file
Once you log in with Github, you can check which repo you want to have Travis build. Once that is done, you need a .travis.yml config file in your project's root. Mine looks like this:
language: ruby
rvm:
  - 2.0.0
install:
  - npm install -g grunt-cli
  - npm install -g bower
  - bundle install
  - npm install
  - bower install
script:
  - grunt build
after_success: bundle exec s3_website push --headless
env:
  global:
  - secure: YzXcqU9FcOenY3BIOu1U1LjlWn5tLqpCIhoSA8GOOLPdD3m2bXAyGTau7ou49f/CJ0PuVBNdQCs9pt405GzLhLcgnDy2YKGEB5h+slusX3u1k7SU3VPsDfJ2oWV8A/cNiWELYf40hRiEduz8bEt2zI0ZkLRMsu+GM/VU3WYHq4I=
  - secure: uNPUARiMIo/Q4vkGSMcnRw0Si4qTkAIJAquvEu3cTtb6XHFGtxUVFThGtTFy0QNFylHnpMoWZ0aQi/2l7iqU5l3CIzYm415S89Ga9T3/5/SOtVg+9EJhf58fYXb33nAjFTcx2kEUvXLz5eAKLD0ZngcKFTR/SnoAe4y7pI6yxhQ=
branches:
  only:
    - master
First you define the project's environment. As you can see, even when using Grunt, we define the project as a ruby project, (apparently, all environments have node/npm installed). Then you define all the steps your build will run (see here for more info on the different steps). install is pretty straightforward, we the have the script: grunt build, and after_success is run when the script was executed successfully. We could also define a after_failure step if you want more the the build failure email.
The env section defines environment variables. The secure keyword means that it has been encrypted thanks to the travis command line tool. To encrypt the S3_KEY variable used in the s3_website config, just run the following commands (--add automatically adds it to the config file if it's found):
gem install travis
travis encrypt S3_KEY=your_key --add
The last section defines the branches on which you want to run the build, in my case I use branches for drafts and experiments, merging into master will then start a deploy (except if you append [skip ci] somewhere in your commit message).
AWS Security credentials
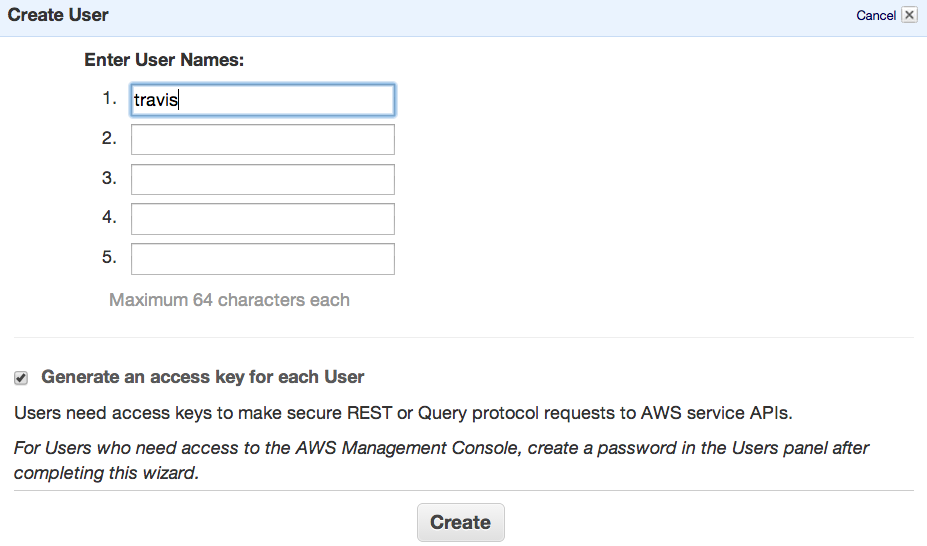
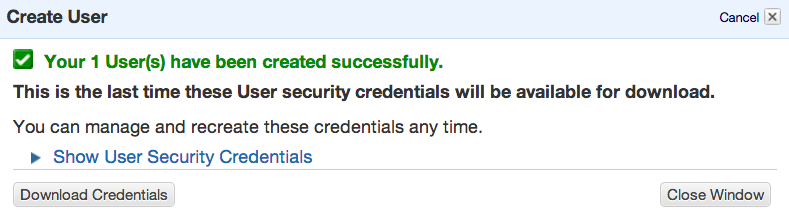
AWS identity management makes it very easy to create multiple credentials on one account and give them limited rights. Which is a good thing as noone should use root level credential on a public repo (even encrypted). To create a contained identity which you can then give Travis or any external service, just go to Identity Management Console and create a new user with the name of your choice. You are then prompted to download key/secret combination authenticating this user (those are the values you need to encrypt using Travis CLI).
After that select the user in the top panel and go to the Permissions tab.
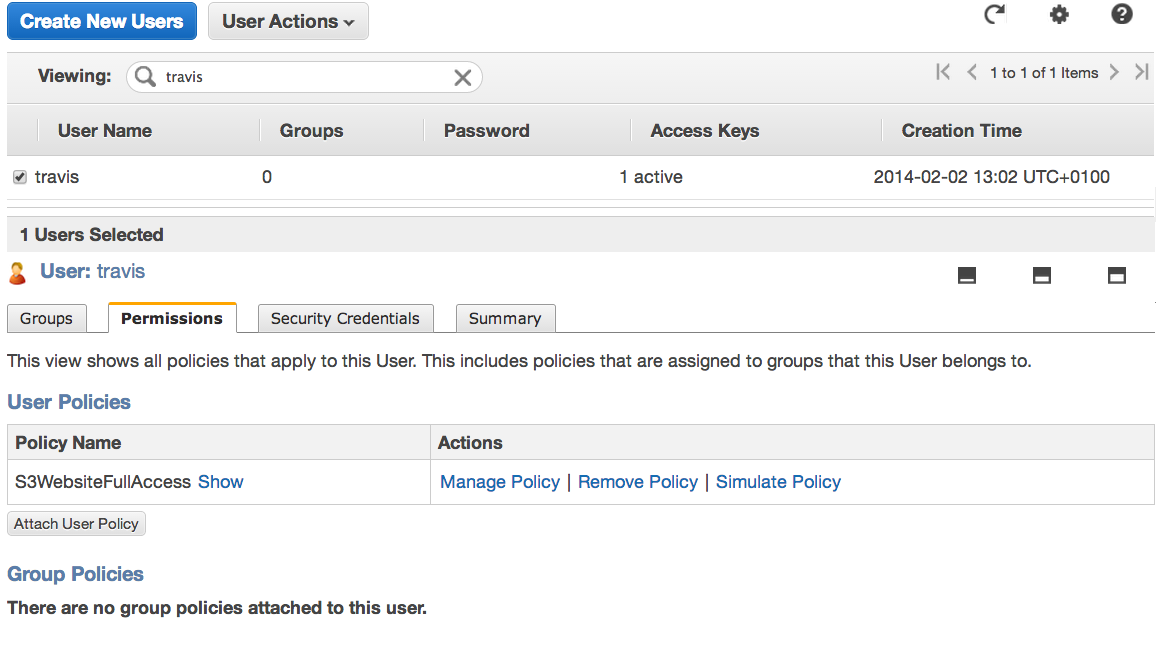
That's where you will set up policies limiting the reach of this specific user. Click on Attach Policy and either use a predefined policy or adapt this one (It gives full S3 access to a specific bucket, lirsac.me here) :
{
  "Version": "2012-10-17",
  "Statement": [
    {
      "Effect": "Allow",
      "Action": "s3:*",
      "Resource": [
        "arn:aws:s3:::lirsac.me",
        "arn:aws:s3:::lirsac.me/*"
      ]
    },
    {
      "Effect": "Allow",
      "Action": "s3:ListAllMyBuckets",
      "Resource": "arn:aws:s3:::*"
    }
  ]
}
Conclusions
In the end, the setup was pretty straightforward thanks to the respective documentations, albeit with a few mistakes on my part. But it still shouldn't take more than an hour to setup, and it's a one time thing with very little added complexity. As for the comparison with Github Pages, I am not aware of any performance issues there, so if you run Jekyll the main advantage is the ability to run custom plugins. If you don't run Jekyll however, any custom static site generator can work without playing with github branches, so the added control can be worth it if you have specific requirements.
Even if it started as an experiment, I have kept it in place as it is free for the moment. To take it further, I started experimenting a bit more as I think it would be interesting to handle versions, uploading a new site to the bucket with the commit sha for example, in order to make interactive mock-ups available to a client. I hope this guide is clear enough for anyone wanting to reproduce the setup.